This is the first of a several tutorials to introduce you to MeshCAM. Feel free to print this for later use or follow along now. If you choose to follow along, you can download the MeshCAM job file here

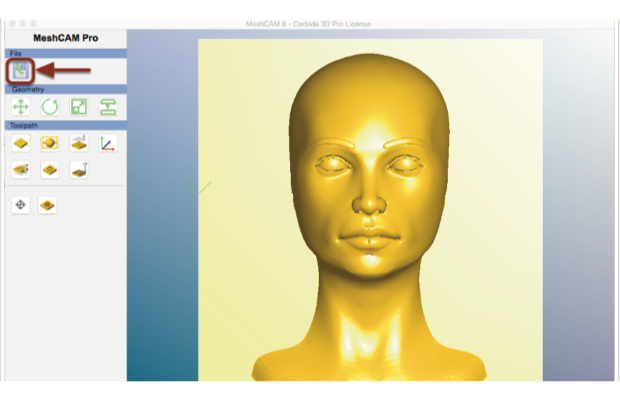
Open File
Click File->Open, or click button shown below, and open the headsample.mcf file you downloaded.
Create Toolpath
Click the Tools->Carbide AutoToolpath menu item
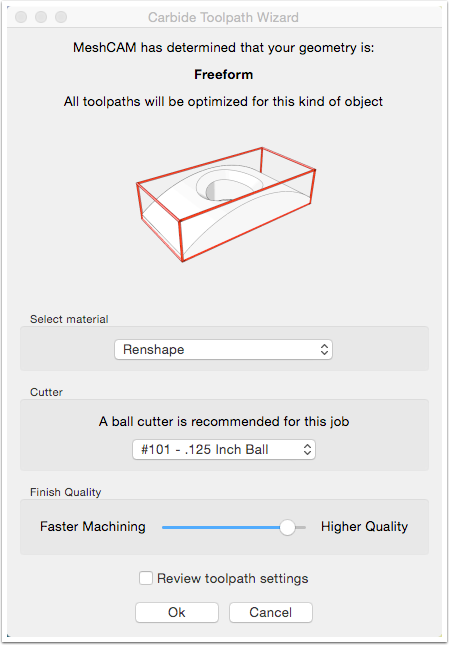
Set the Job Parameters
The Carbide version of MeshCAM includes a special wizard to set all of the machining parameters of the job. Because our wizard has full knowledge about the performance of the machine, it can work with only three pieces of information, the Material, the Cutter, and the desired Quality.
- Select Renshape as the material
- Select the #101 Ball Cutter
- Move the slider over to "Higher Quality"
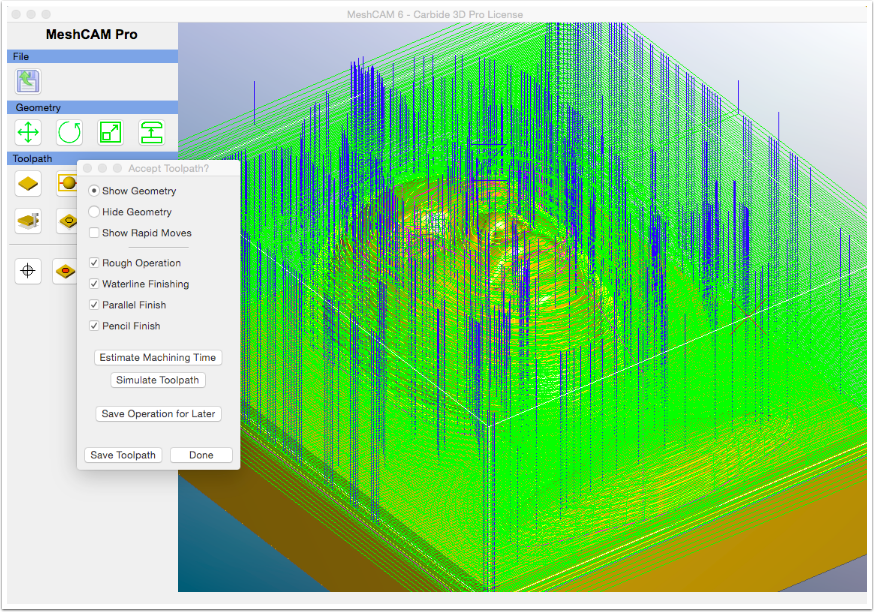
Review the Toolpath
You can now spin the model around to view the toolpath. If you'd like to simplify it, you can disable the various toolpaths, roughing, waterline, parallel, and pencil, to see how it goes together.
Just a warning, only the toolpaths that are shown will be saved. You must reenable all of the toolpaths before saving.
Save the Toolpath
Click the Save Toolpath button.
Run the Job in Your Nomad 883
The tutorial showing how to run a file on the Nomad is at http://carbide3d.com/docs/tutorials/1-wrench/
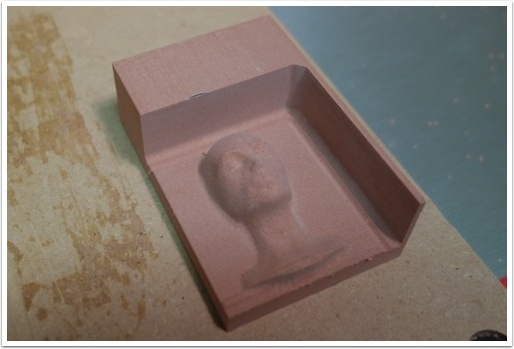
After some machining time, you'll end up with like the picture below.
The image below shows one of the tradeoffs in machining. You can machine more quickly with a bigger cutter, in this case a .125″ ball mill, or you get get better detail if you use a smaller .0625″ cutter that takes more time. Ultimately, you'll have to make the decision about what's more important to you — faster machining or better detail.