Home Switch Troubleshooting
Listed below are several common problems found during home switch installation and initial setup. Review the items below to help you identify what could be causing your limit switches not to trigger. This usually results in a grinding noise as the hard stop engages while trying to find the home switch.
Shown below is the location of all 3 homing switches mounted on your machine (X, Y, and Z).
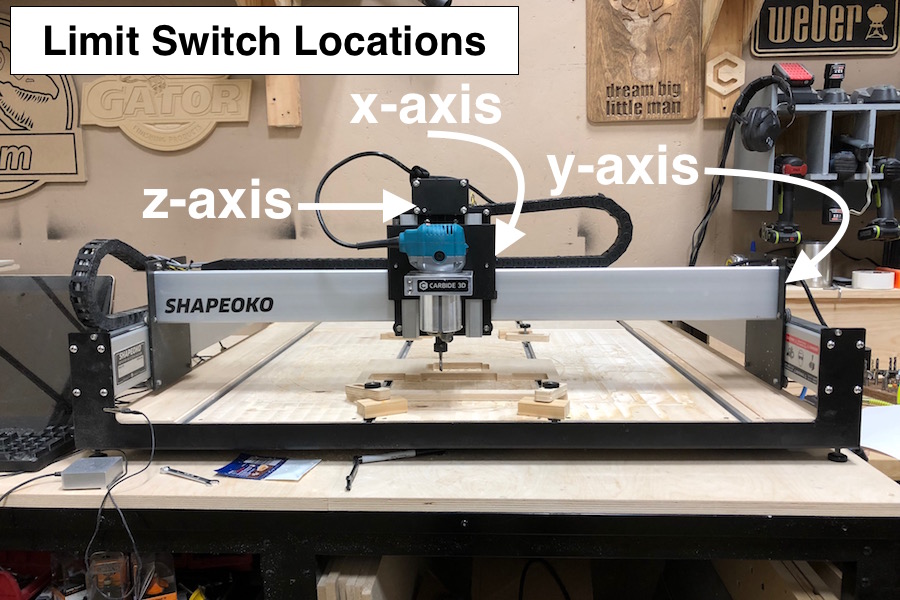
Troubleshooting list
1.) The switch is on the wrong side of the plate. This should be less of an issue now that we pre-mount the switches to the plates during the pre-assembly of the wiring harness. Here is a picture for reference of a correctly mounted plate.
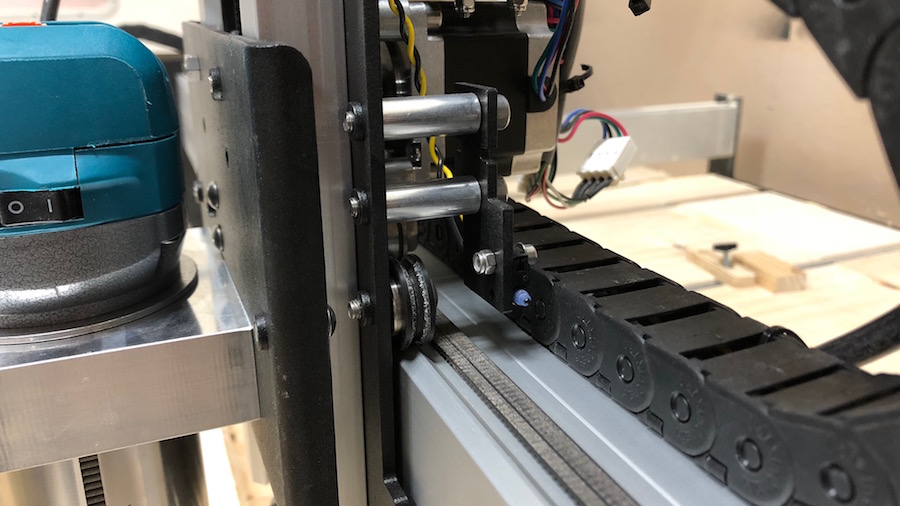
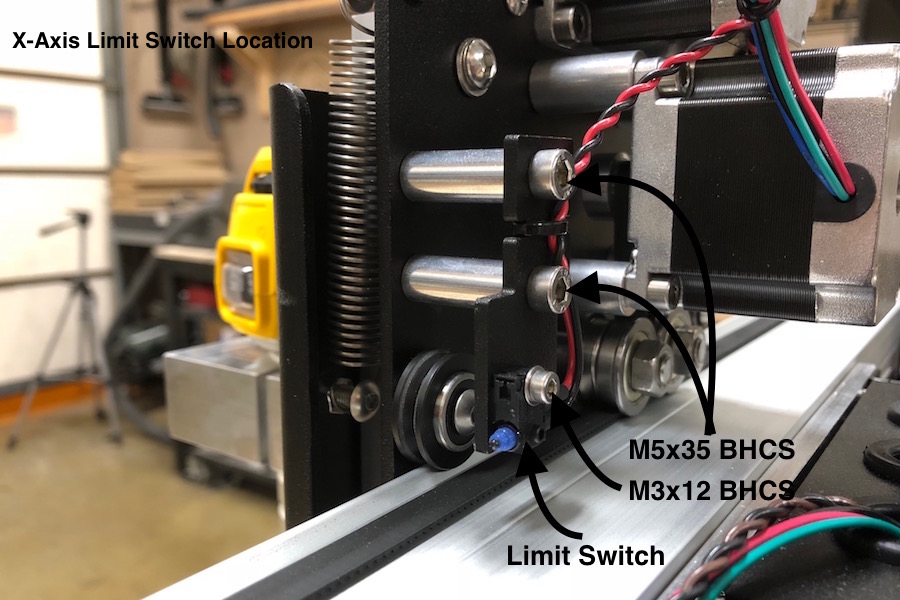
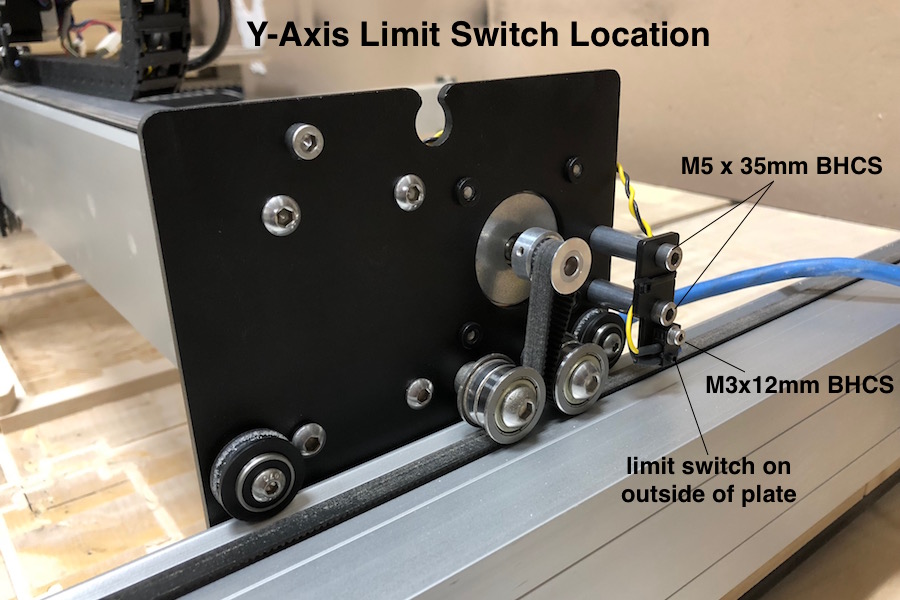
Solution: Move the switch to the other side of the plate.
2.) The drag chain is too tight. That is, the spot where the drag chain end is taped to the extrusion is too close to the Y-left plate. For reference, the drag chain should be about 2.5” away from the left Y plate.
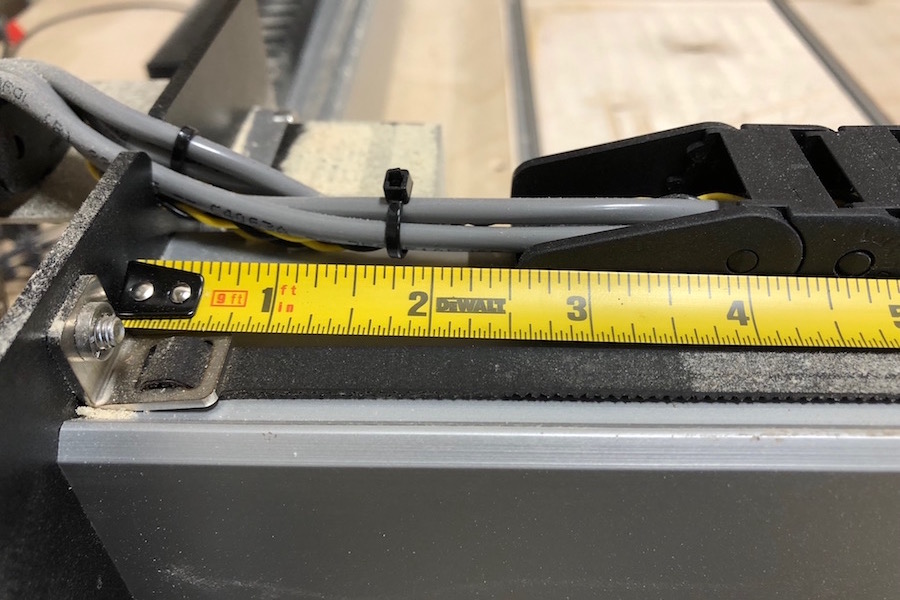
Solution: Adjust the end of the drag chain to be further away from the Y-Axis left plate.
3.) The drag chain is at an angle towards the front of the machine. This will cause the screw head of the limit switch to interfere with the drag chain as it gets close to the Y-Right plate.
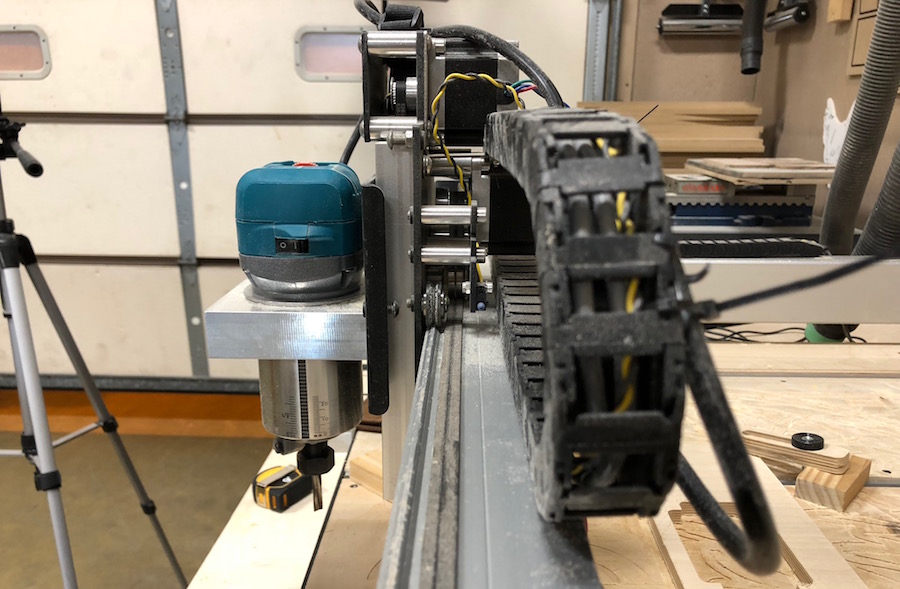
Solution: Adjust the drag chain so it is running perpendicular to the X-axis rail. You can even cheat this so it’s running away from the rail towards the back slightly.
4.) The power cable for the trim router is binding between the X stepper motor and the inside of the drag chain.
Solution: Secure the router power cord to a better location on the drag chain. With the power to the machine off, slowly slide the X/Z left to right to ensure the interference has been removed.
5.) The switch mounting plate is tilted in the wrong direction, causing the gantry plate to contact the hard limit.
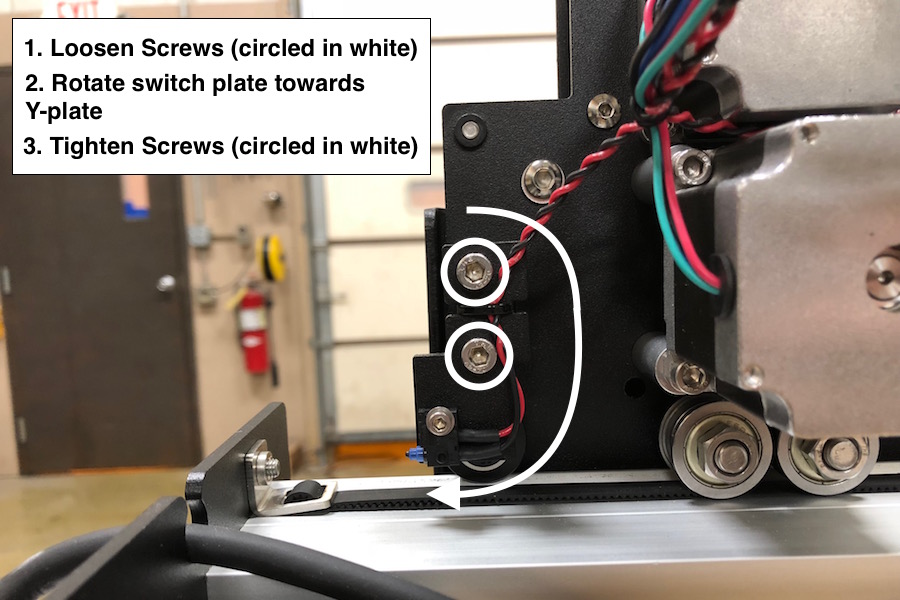
Solution: loosen the mounting screws (M5x35mm BHCS) and slightly rotate the mounting plate to better contact the edge plate.