This first tutorial will walk you through the process of running a project on the Nomad 883. Rather than start with a 3D file, we'll start with a G-Code file to show how to operate your machine
You can download the file at http://carbide3d.com/files/wrench.nc


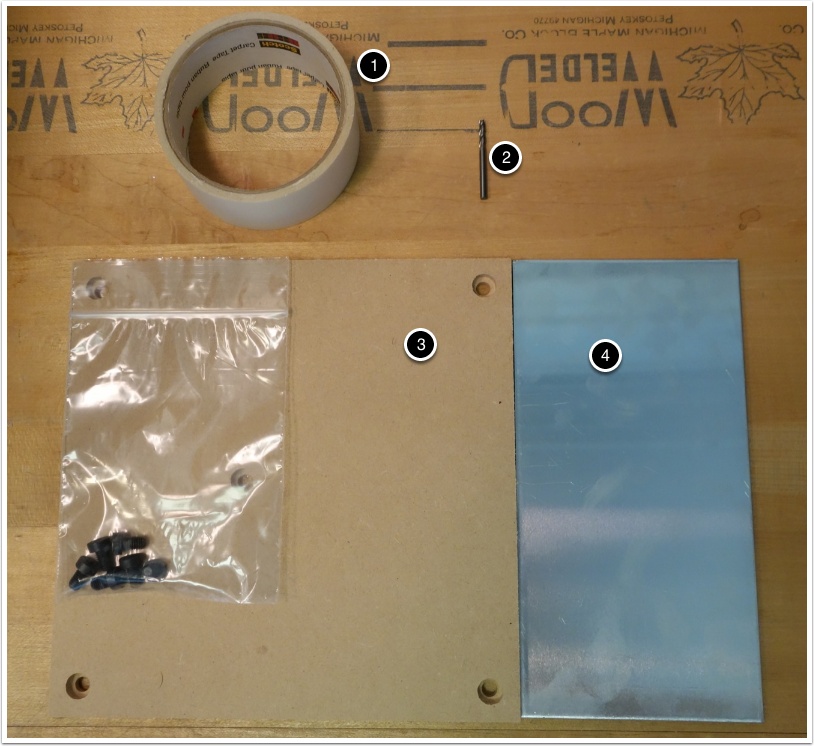
What you'll need
- Double-sided tape
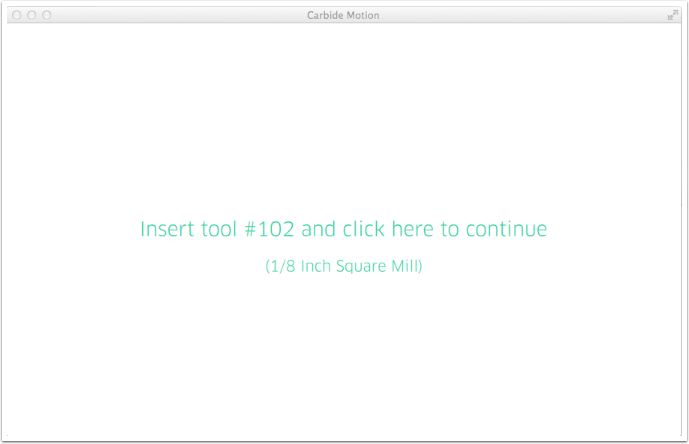
- A 1/8″ square cutter (Tool #102 in you're using Nomad Tools)
- A wasteboard and M6 screws
- A small piece of aluminum composite panel.
All of the items above were provided with your machine. ĀYou may have a smaller, or differently shaped, piece of aluminum composite panel but anything you have should work.
The aluminum compositie panel will be called "stock material" which is a generic name for the material you're cutting.
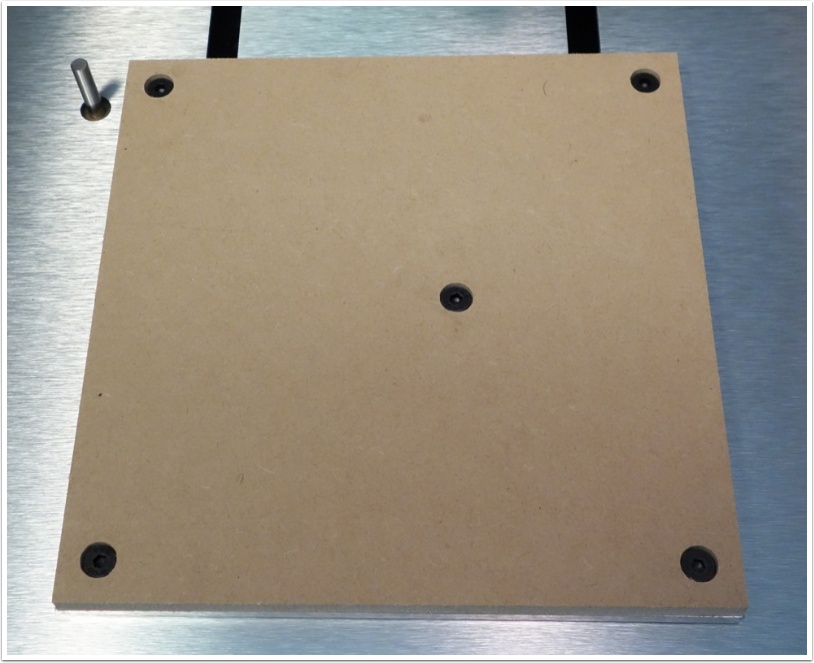
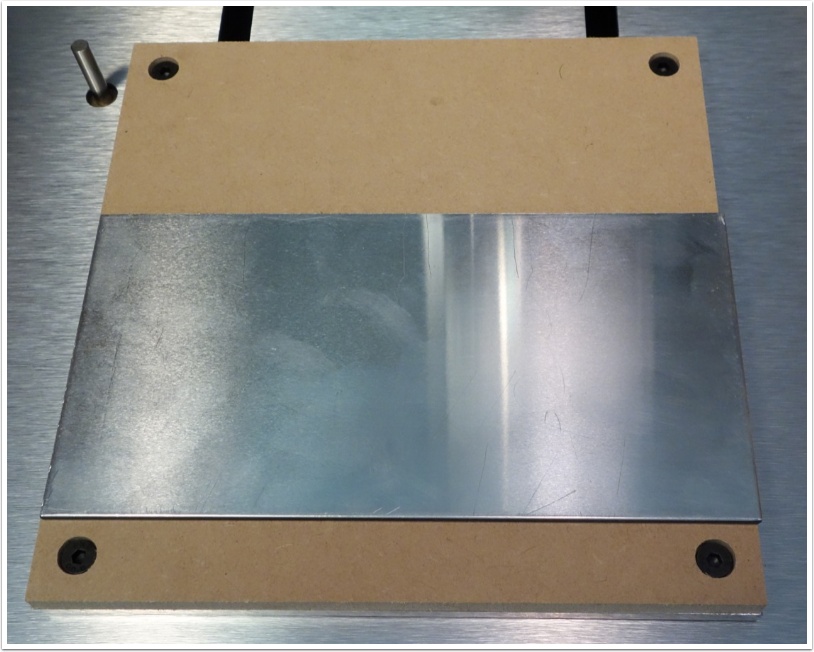
Attach wasteboard to table
The wasteboard is used to protect the table of your machine from damage. In this case we'll be attaching the stock material to the wasteboard using double-sided tape. While you can attach it directly to the table, you are likely to cut through the stock material and into the table at some point.
Put double-sided tape on stock material
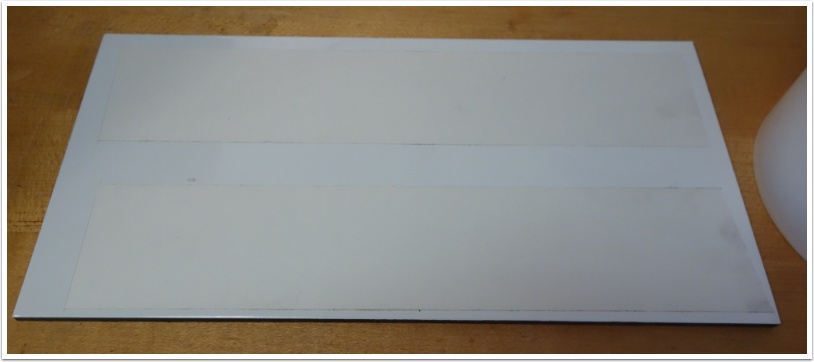
Attach stock material to wasteboard
It's not important to locate the stock material at any particular point on the table. We'll go through the process of "zeroing" the machine so that you can tell it where the cutting should happen.
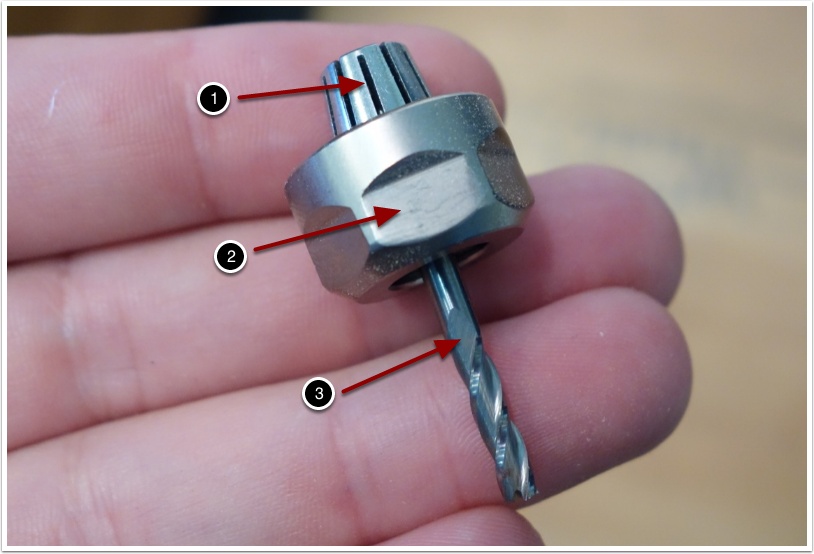
Put cutter in collet and collet nut
The collet (1) is responsible for holding the cutter (3) when the collet nut (2) is tightened in the spindle.
If this is the first time you've used your machine, the collet may need to be "clicked" into the collet nut before inserting the cutter.
Note: A collet is sized to hold one diameter of cutter. Your Nomad 883 comes with a 1/8″ collet and is capable of holding any 1/8″ cutter even if you did not buy it from Carbide 3D. You can buy additional ER-11 collets to hold different diameter cutters from Carbide 3D or other vendors.
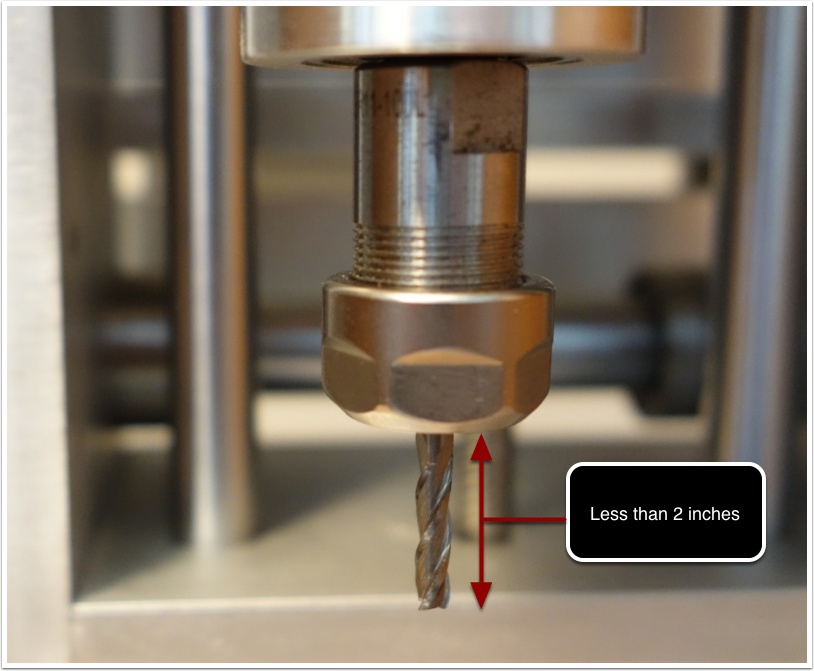
Put collet nut on spindle
Tighten the collet nut onto the spindle.
Note: When tightening the collet nut, the tool should not extend more than 2 inches from the collet nut.
Shut the protective cover.
A short digression on safety
The window on the Nomad 883 is there for two reasons, contain the mess and protect the user from broken cutters and flying stock.
The cutters are made of carbide, a very hard, very brittle metal. When they break, they snap suddenly and without warning. The window will help protect you from these broken cutters.
The second danger is that the stock material can break from during cutting. This can happen because you failed to use enough tape, because the material didn't adhere well enough using that tape, or because you were cutting too fast.
If either of these happens during a job, power the machine down (hit an E-stop if one is available on your setup) and fix the problem.
In summary, close the cover when the machine is running.
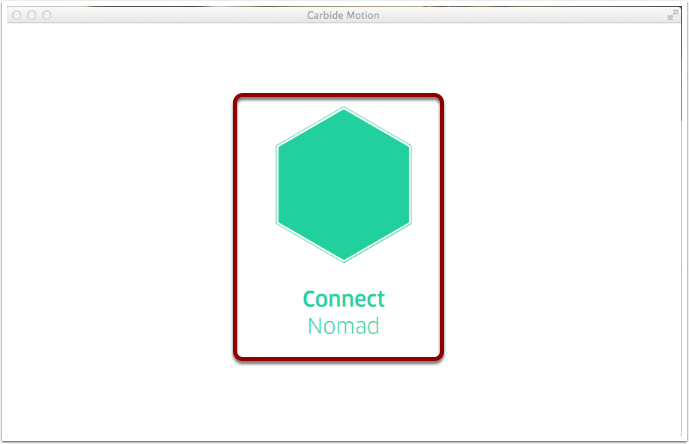
Connect to Nomad 883
The Nomad 883 is controlled by a program called Carbide Motion.
If you do not have Carbide Motion, you can download it at http://carbide3d.com/downloads/
Start Carbide Motion and click Connect Nomad to continue.
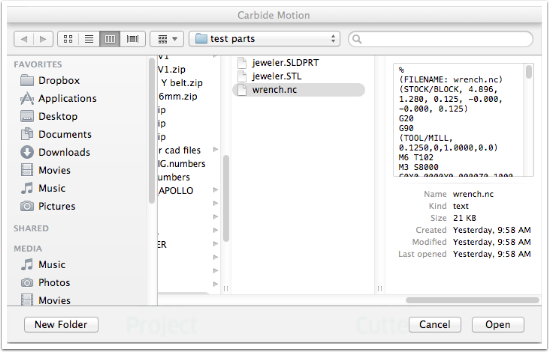
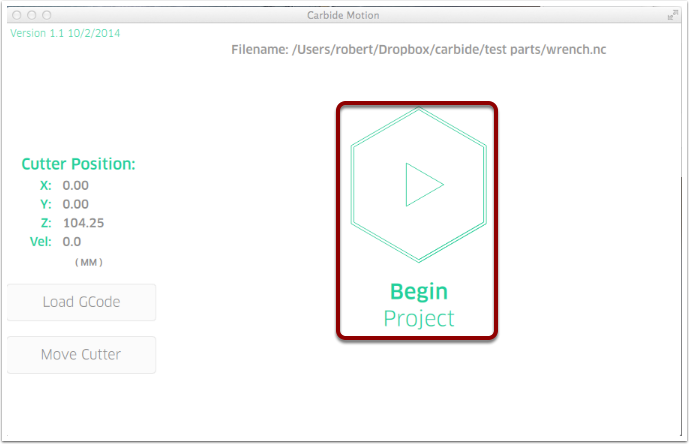
Load your file
Once you connect to the machine, you have only two options — load a project or move the cutter manually. Click Load Project.

The Nomad 883, as well as most other CNC machines, runs files called G-Ccode. G-Code is a format that goes back decades to the original CNC machines in the 1960s. G-Code is basically just a set of motion commands that tells a machine what cutter to use, a series of coordinates to move to, and the information about how fast to go. G-Code contains only this motion information, it does not contain your original CAD data anymore.
Select the wrench.nc file
Locate stock material on the table
Remember how we said that we'd have to tell the machine where to find the stock material on the table? We do that by manually jogging the cutter to the location where we should start cutting.
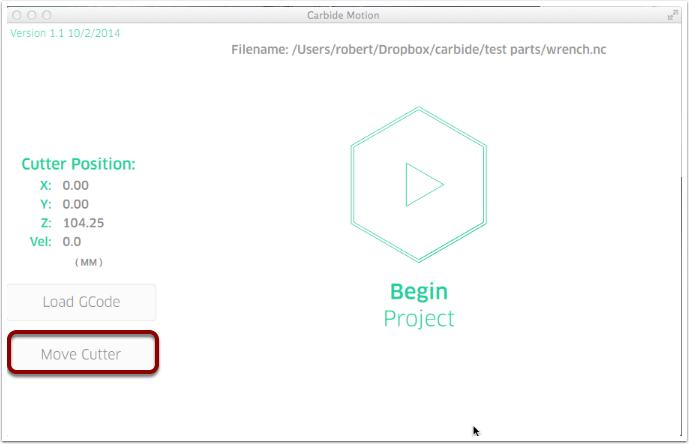
Click Move Cutter
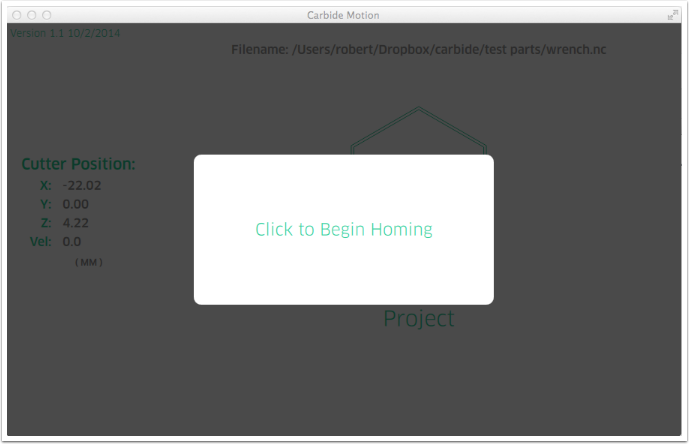
Before doing anything requiring precision, the machine will home itself.
Homing is the process of going to a known location where the machine has sensors to ensure that the cutter is in the correct position.
Click in the box to begin the homing process.
After homing, the machine will attempt to measure the tool length. As you may have noticed when putting the tool in the collet, there is nothing on the tool to set of far into the collet it should be. The Nomad 883 includes a tool length sensor to enable it to figure out how fat the tool extends from the collet.
Click in the box to continue.

Move the cutter to the lower left-hand corner of the stock.
You can move the cutter by clicking the X, Y, and Z buttons or with the following keyboard commands:
- Cursor Keys: move X or Y
- Page Up: Z+
- Page Down: Z-
- , (Comma) : Z-
- . (Period) : Z+
- 1,2,3,4 : Select Move Increment
The Nomad 883 has a motion queue so it is possible to click a button several time to get longer moves.
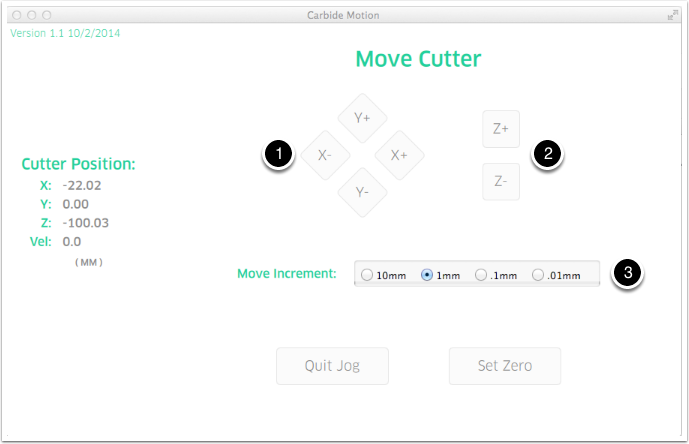
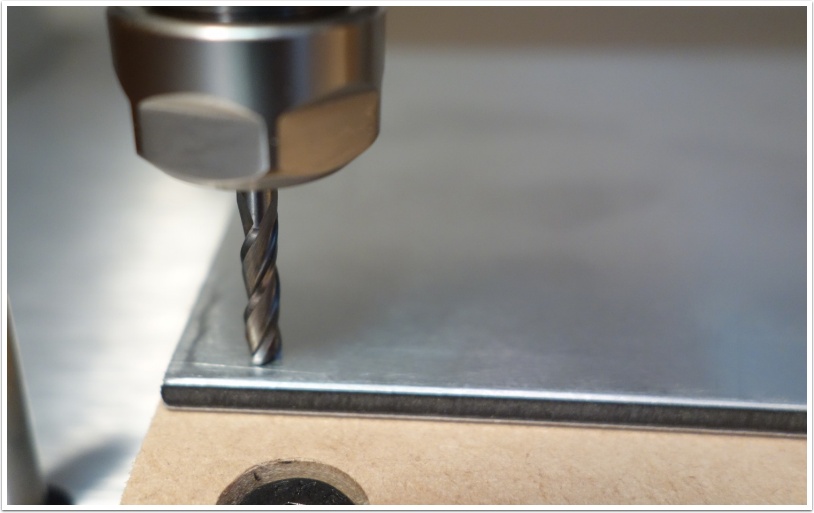
You should move the cutter until it's in the lower left-hand corner of the stock, just barely touching the top of the stock material.
The most difficult part is touching the cutter to the top of the stock material. It can be helpful to put a small piece of thin paper on top of the stock and lowering the cuter until you can just feel it dragging on the paper when you slide it.
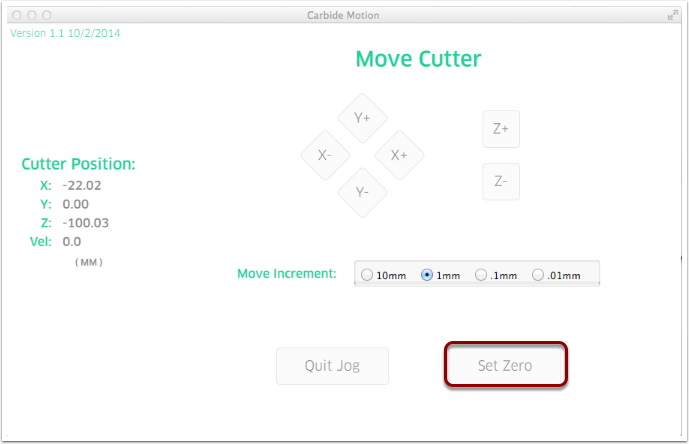
Zero the machine
Click Set Zero.
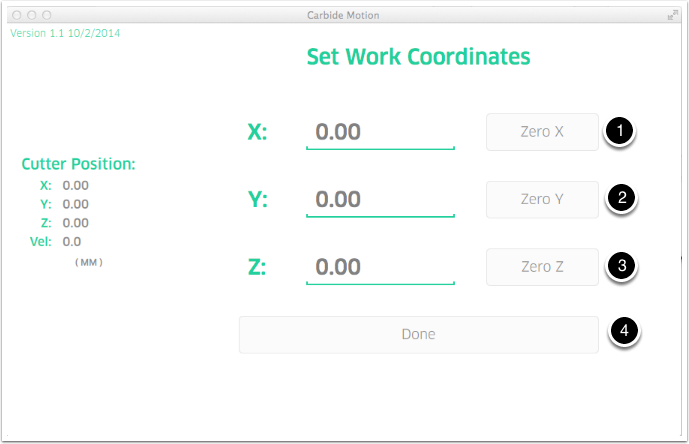
- Click Zero X
- Click Zero Y
- Click Zero Z
- Click Done
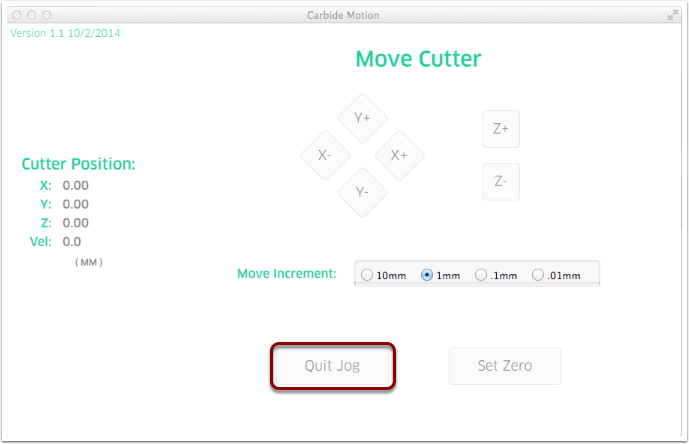
Click Quit to continue
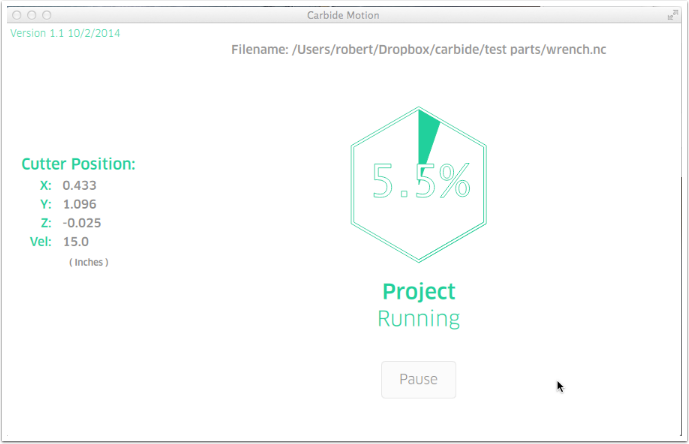
Start Cutting!
Click Begin Project
The G-Code contains information about the cutters required to cut a part so Carbide Motion can notify you when a tool change is required.
Because you already loaded the correct tool before zeroing the machine, you can just click to continue.
Your Nomad will do one final homing and tool measurement cycle and then begin cutting your part.
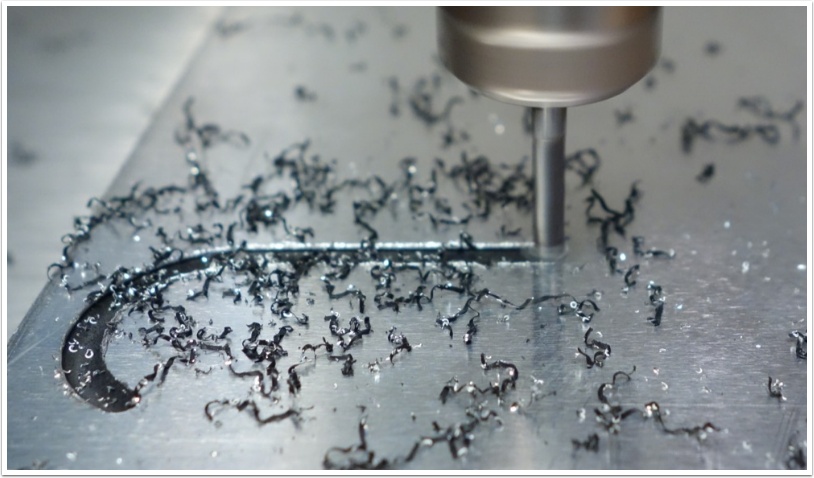
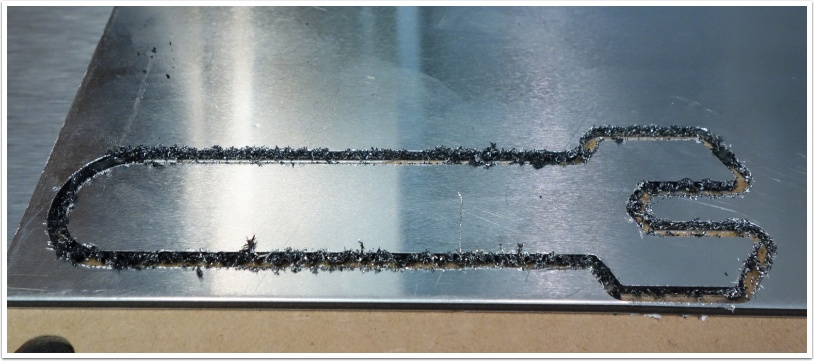
Wait for part to finish
Once your job is done, you can gently pry it off the wasteboard. You can see in the image below that the cutter went though a little bit of the double-side tape and created a small mess.
This is something you'll have to think about when using double-sided table in the future. Some users prefer to cleanup a little adhesive at the end with a suitable solvent rf just by picking it off.
Other users prefer to set the machine to stop cutting just before the cutter breaks through the stock material. Typically you'd leave .002″-.005″ of material on the bottom. If you choose this option, you'll likely have to cleanup the bottom face of the part with an X-Acto knife or a file to remove the sliver of leftover material.