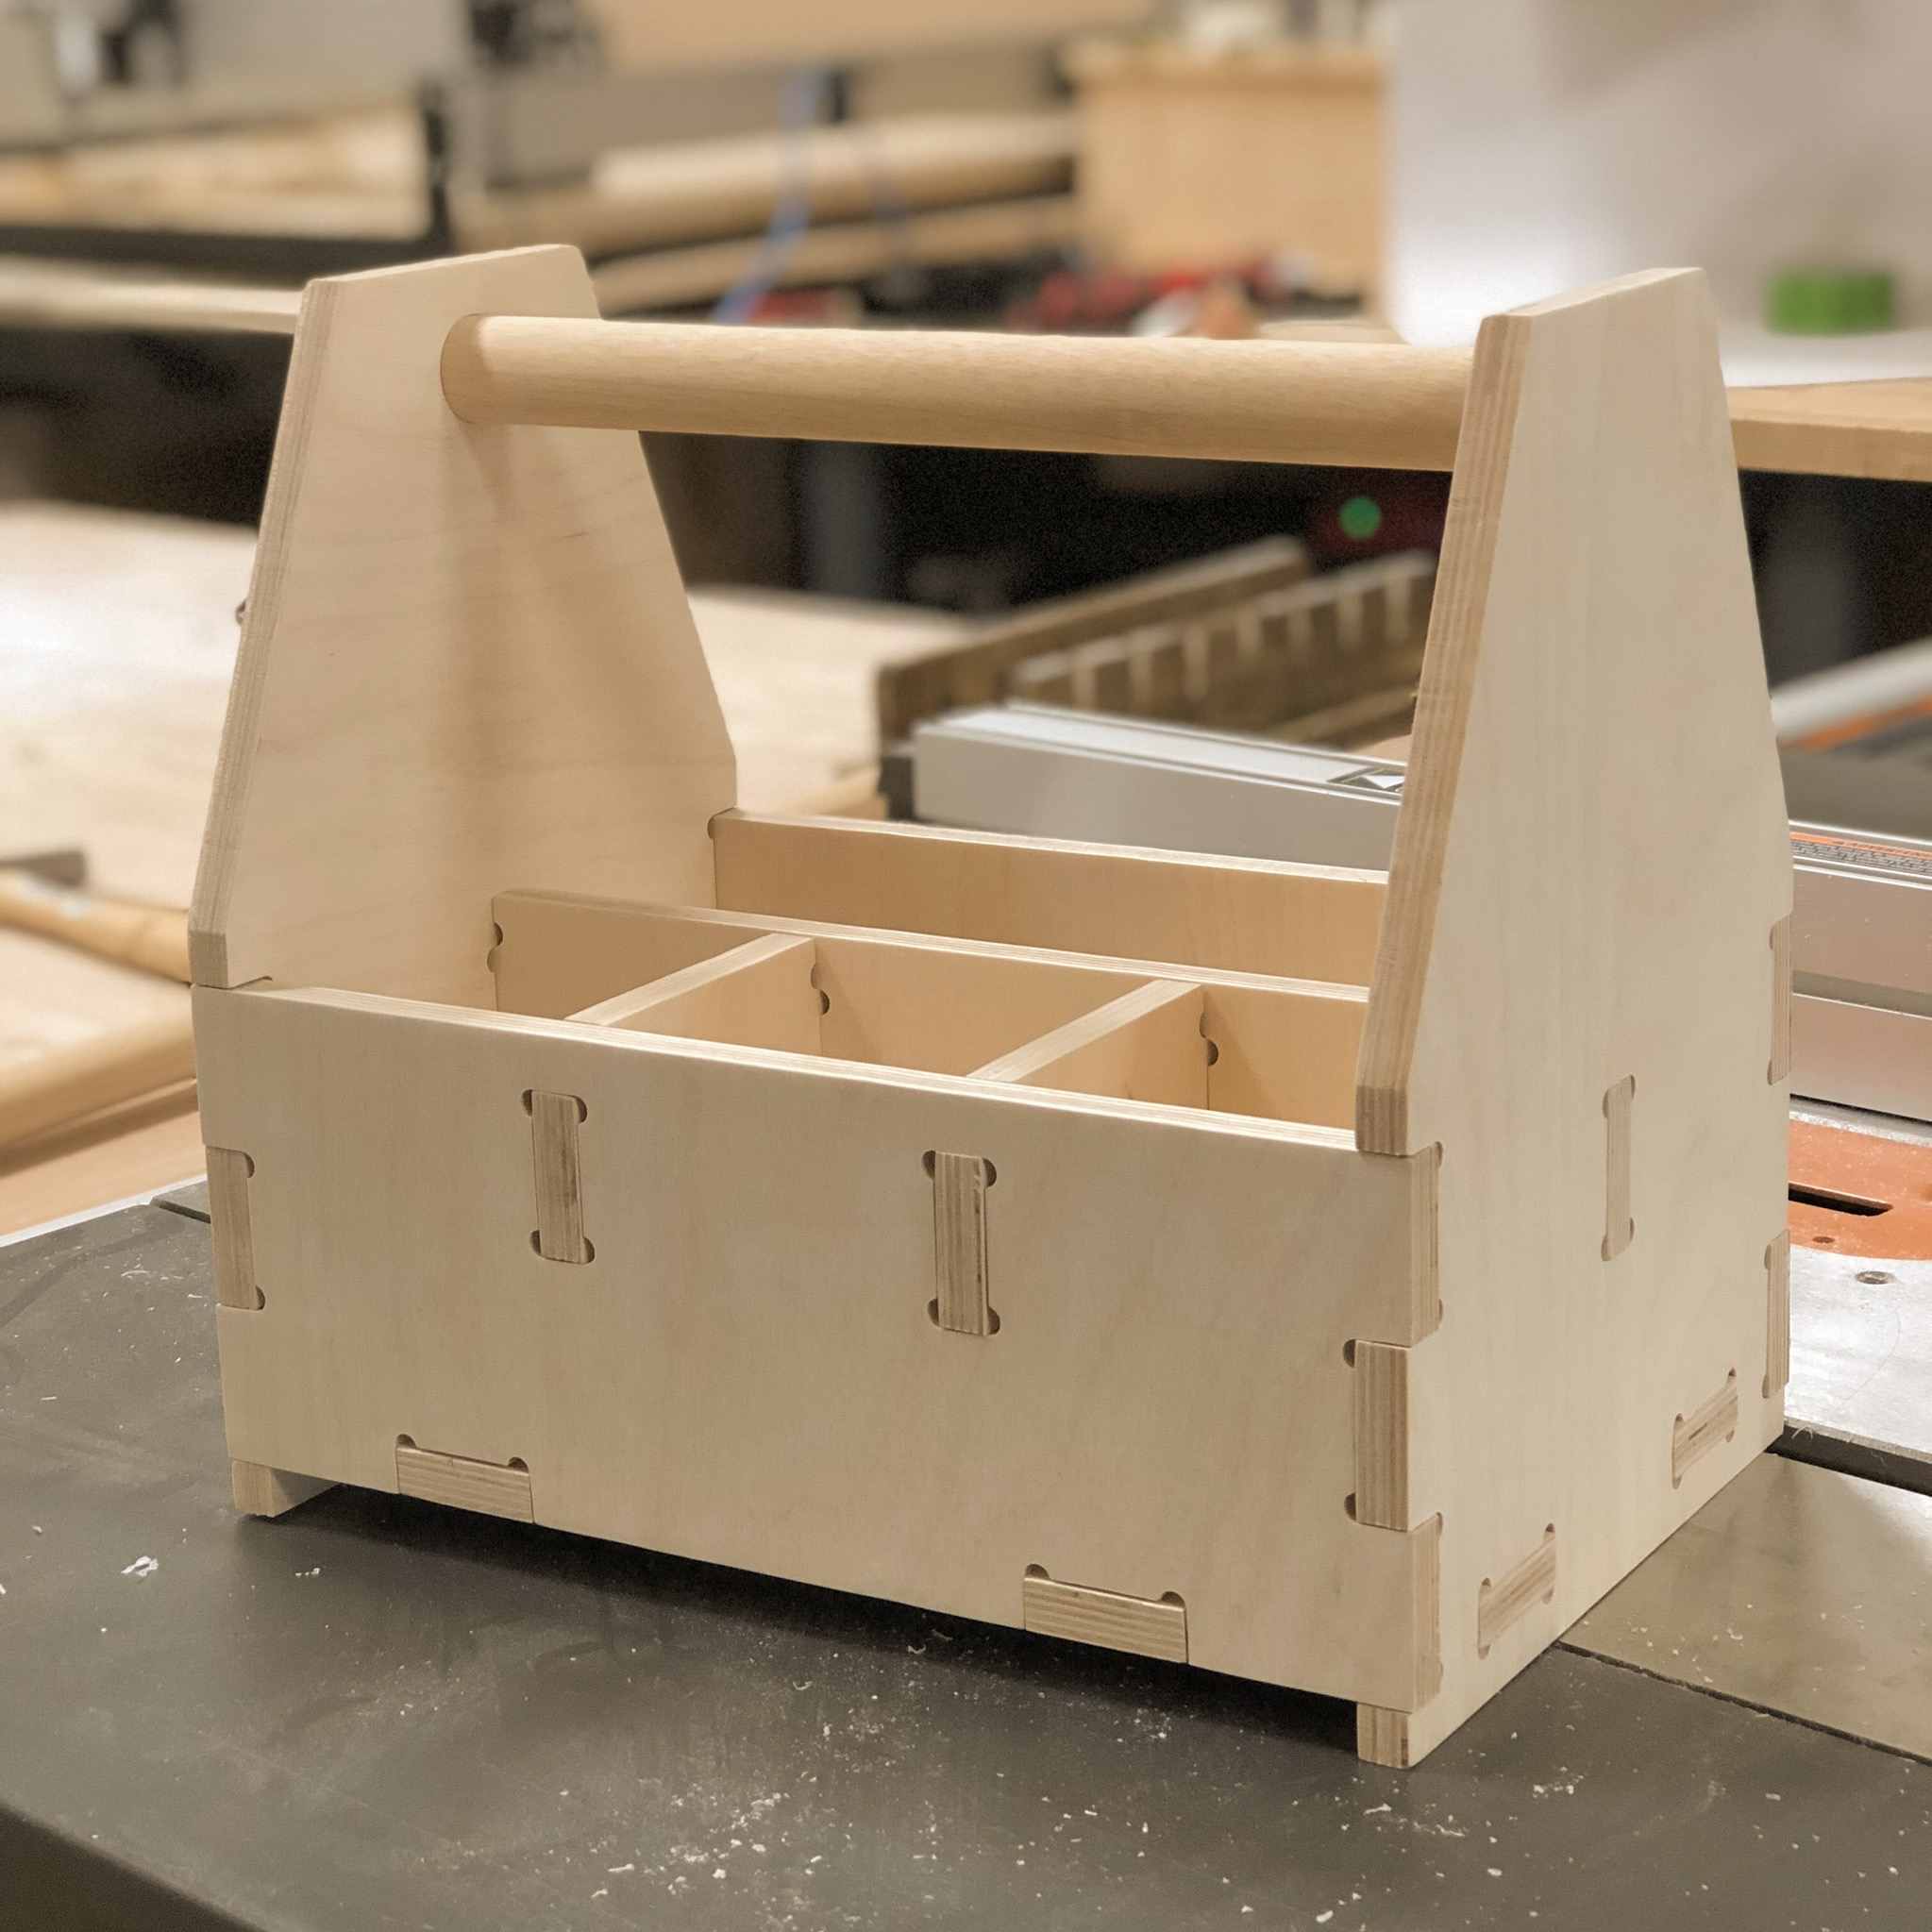
Caddy Organizer
Download the Carbide Create file for this tutorial: caddy.zip
Requirements
- #201 Cutter (1/4″ endmill)
- 24″ × 30″ × 12mm Baltic Birch Material
- 1″ Dowel (birch dowel used in this example)
- Sandpaper / Random Orbit Sander
- Stain (or paint) or Finish
- Wood Glue
Instructions
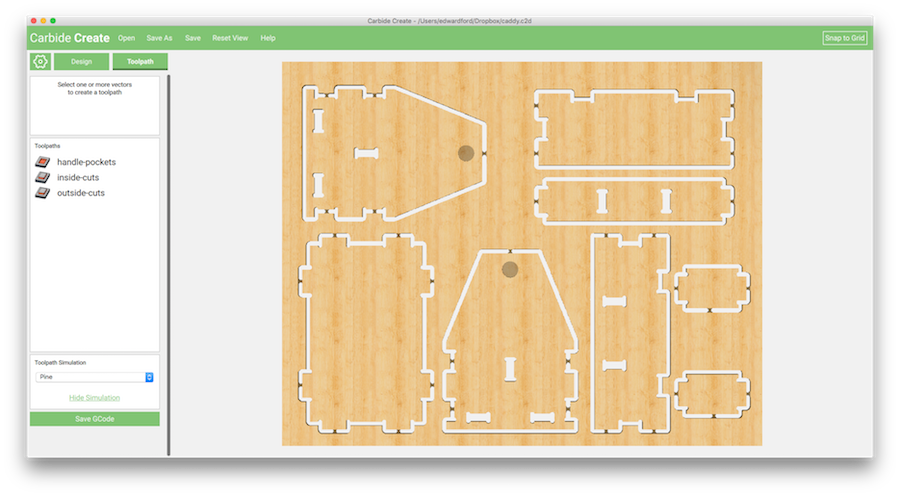
- Download the carbide Create project file from the top section of this page.
- Verify all of the toolpaths are using the correct cutter
- Export the G-Code
In Carbide Motion, note the zero point is the lower left corner of the material. If you are using the Probe, probe from this location. Otherwise set the zero point manually for X,Y,Z.
The entire jobs runs with a 1/4″ cutter, using an upcut (#201) or downcut (#251) will yield very similiar results.
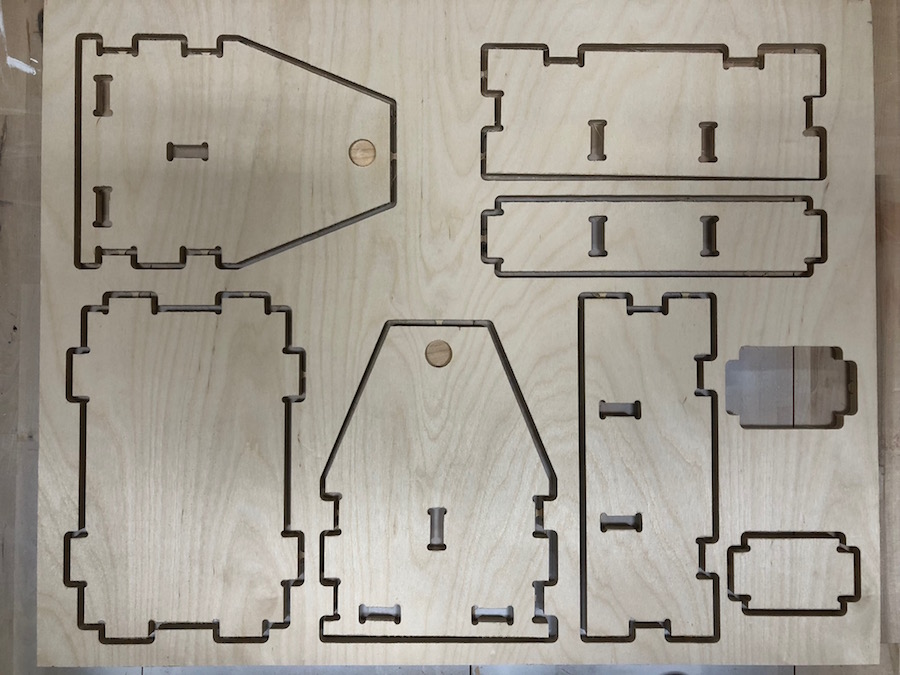
After the project is complete, remove the tabs to free your parts from the material. Using a small flush cut hand saw or a powered multi-tool works well for this.
Finish
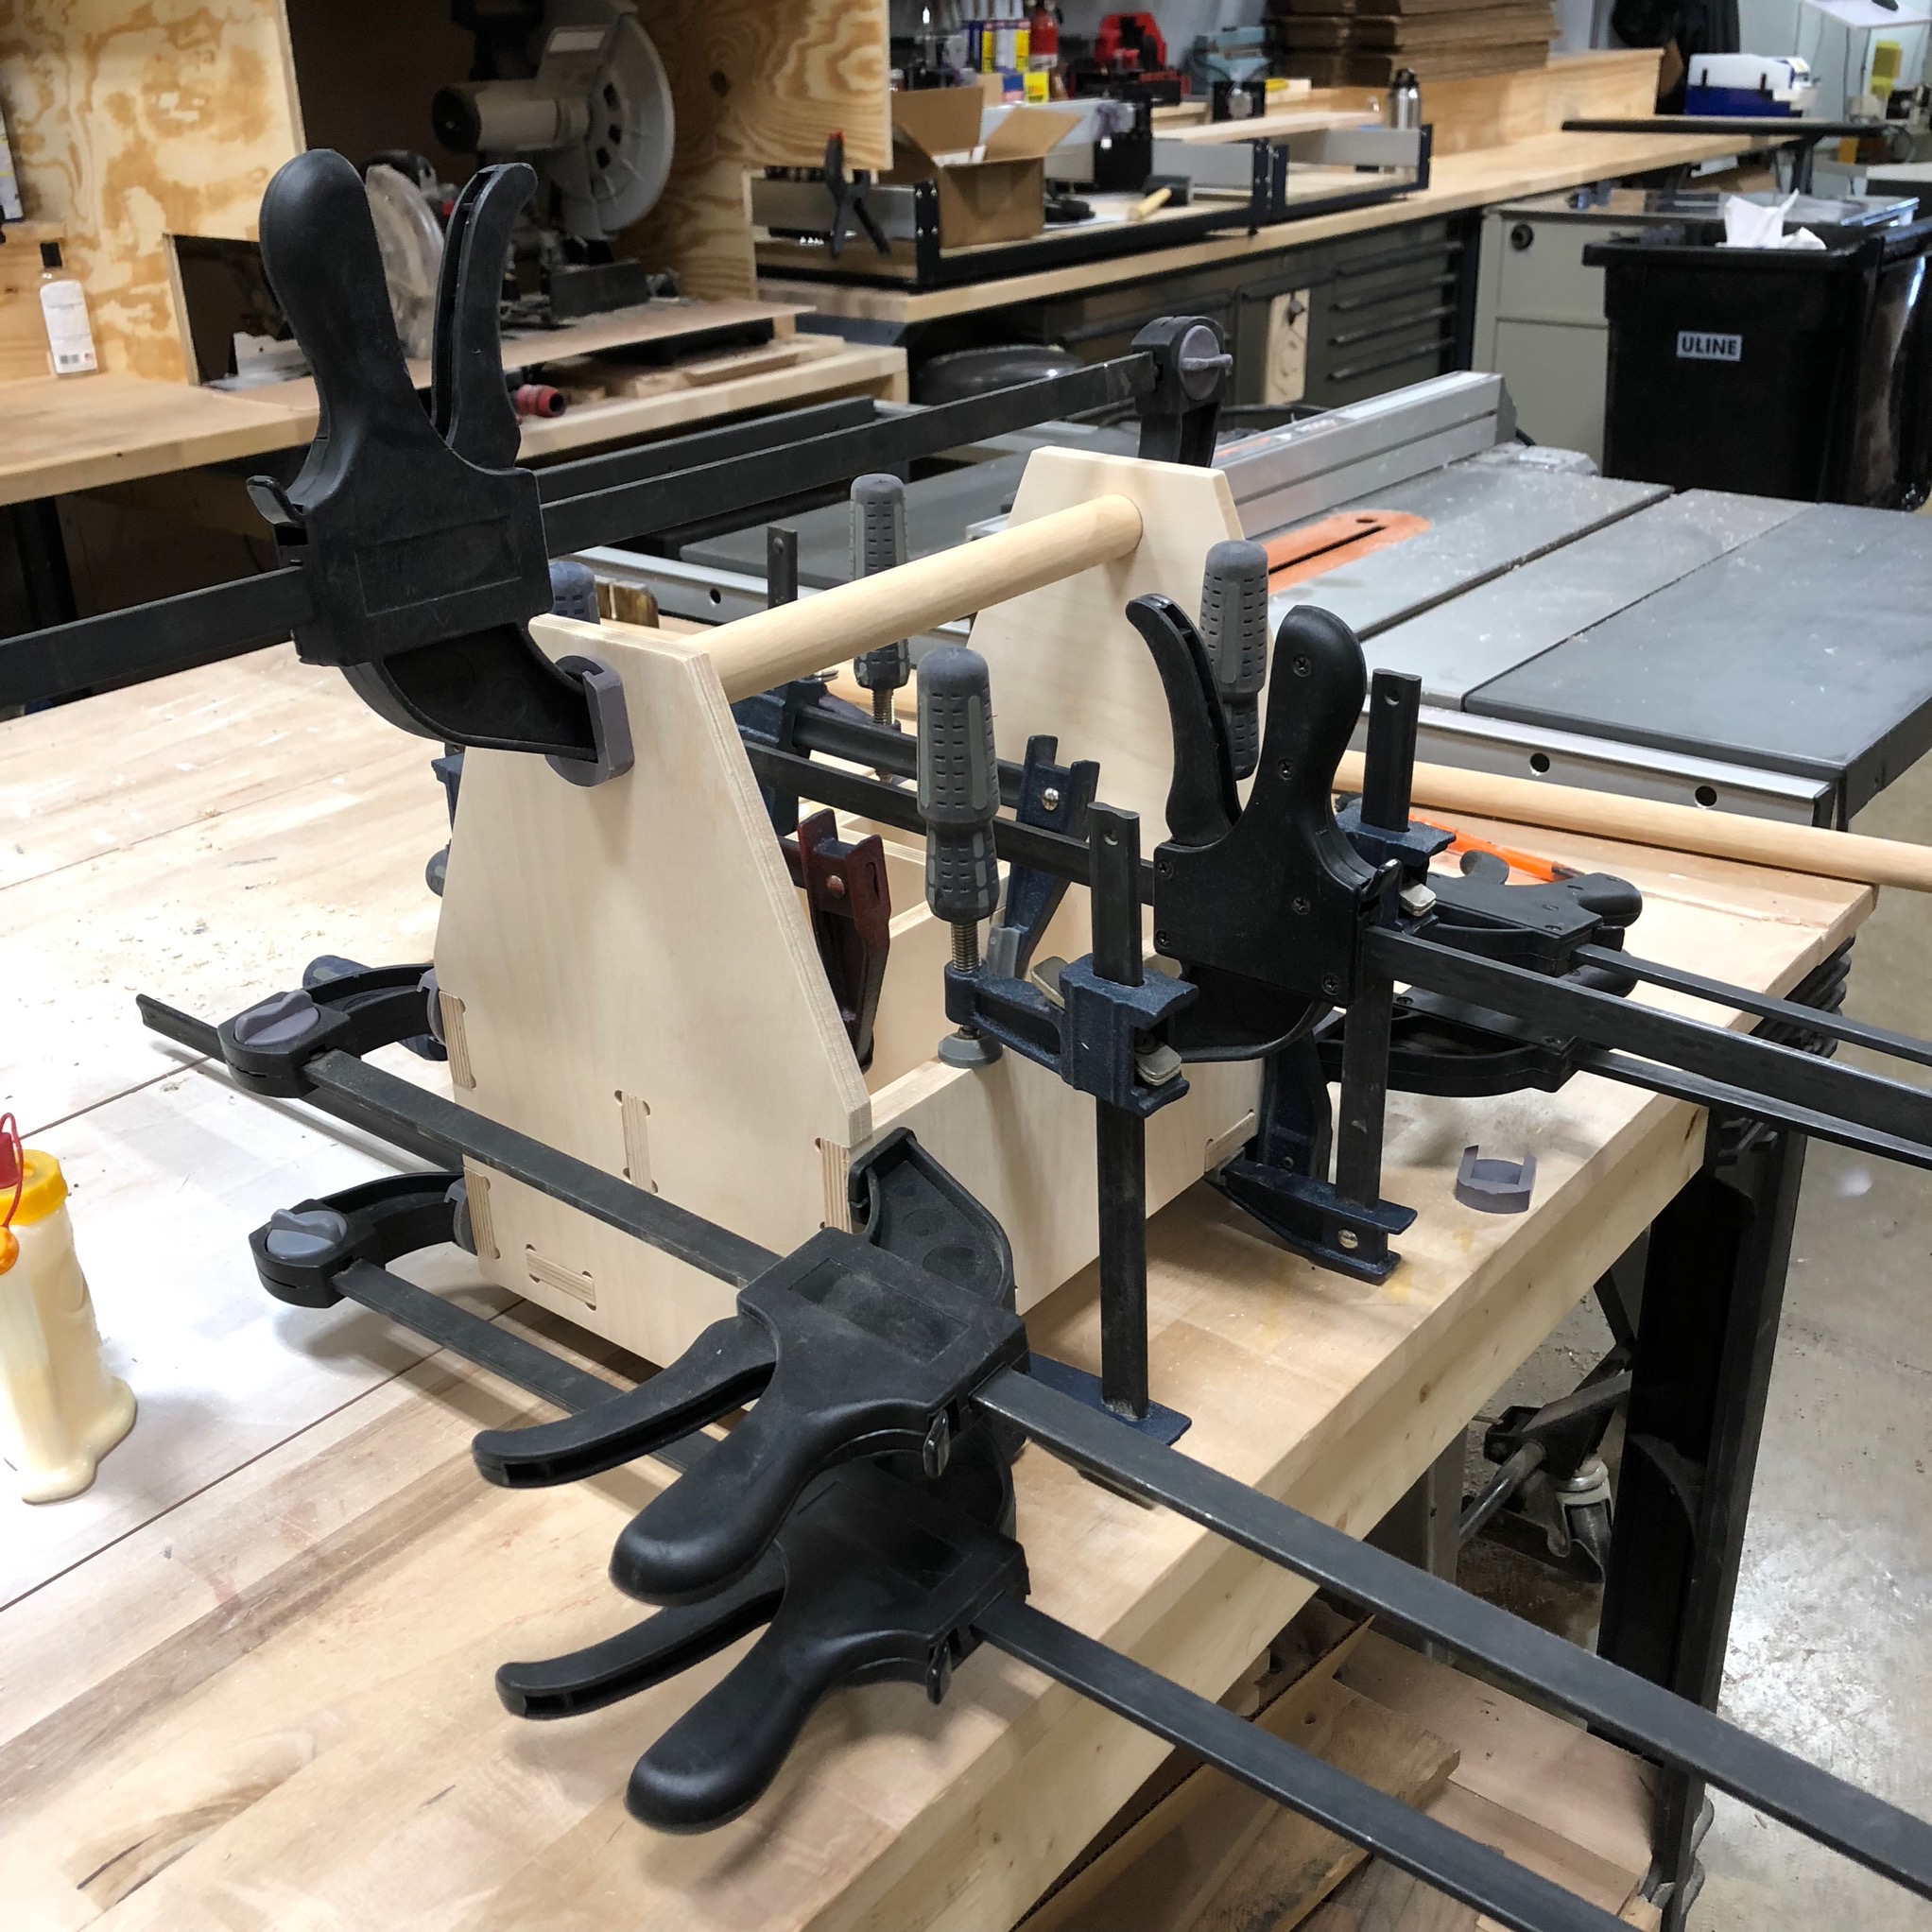
- Sand all of the edges and surfaces of the material.
- Dry fit everything together to ensure the fit is as you would expect.
- Once you are happy with the fit, glue up all of the surfaces which mate.
- Clamp the pieces together while the glue dries.
- After the glue dries, remove the clamps and clean up any glue residue that may have leaked out during drying.
Finish the project with the stain or finish of your choice. In this example butcher block oil was used to give the caddy a nice shiny look and too add some contrast with exposed end grain.